Share a PowerPoint Presentation
Hosts and Presenters can create multimedia presentations containing slides, streaming audio, synchronized animation, and navigation controls rapidly using Microsoft PowerPoint as a base, then share the lecture with participants. When viewing the presentation you have complete control over the screen side, slide navigation, and audio.
The first step is to create your presentation as desired in Microsoft PowerPoint and save it to your local computer.
Once done, log into your scheduled meeting and using the Share Pod, select the pull down menu for Documents and click on the "Select from my Computer..." option.

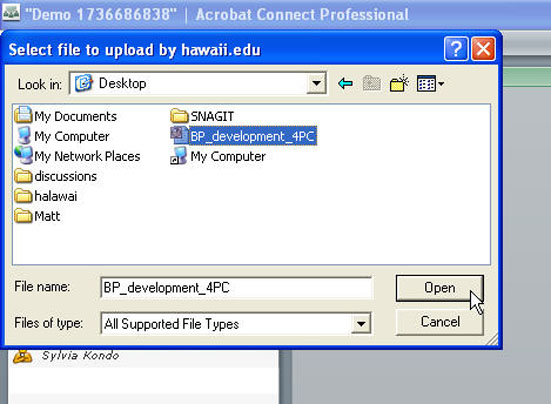
Locate your powerpoint presentation on your local computer, click on the title once to select and click on the Open button.
The program will upload and convert the presentation for sharing.

Once successfully converted your first slide becomes viewable. Flip through slides by using the forward/backward arrows in the lower right of the Share pod screen.
NOTE: Students also have the ability to move through your presentation in their own view. If you would like them to only see what you see and have no control of their view of the presentation, click on the "Sync" button in the lower left of the Share pod window.

You also have the option to show the Outline and Notes view for yourself or to all participants by clicking on the "Notes" icon next to the forward/backward buttons.

Best practices for creating presentations for sharing (optional):
Design your online presentation based on the bandwidth capabilities of your audience. If your audience has fast, broadband connections, you can create a graphic-intensive presentation that includes many animations. However, if your audience has slower connection speeds, you should consider using graphic images only (no animations) or no graphics at all, to ensure that your audience has a good viewing experience.
Consider creating a written script before recording audio for your presentation. Speaking into a microphone can be more difficult than giving a presentation to a live audience. To ensure a smooth delivery that covers all of your important points, consider creating a script for the entire presentation before recording audio for it. (If you have slide notes written in PowerPoint, you can easily import them into Presenter to use as a script or as the basis of a script.)
Add animations to enhance the overall presentation, if your audience has fast connections. Presenter supports PowerPoint animations so that you can create powerful, animated, multimedia presentations. Animations add impact to your message and improve the user’s overall viewing experience. (Animations must be set to On Click.)
Create presentations that are a manageable size. A single PowerPoint presentation typically corresponds to a single module or course. Usually a module contains 20-40 slides and results in a 15-45 minute sessions for users. If single PPT files become larger than 40 slides, the time it takes Presenter to convert the presentation to Flash format can increase by several minutes.
Preview the presentation by publishing it locally before publishing to a Connect Enterprise Server. This lets you view the converted presentation to be sure that it meets your requirements.
Create slide titles to give users easy access to any slide. Check that titles appear in the PowerPoint outline for all slides, including graphic-only slides, before publishing your presentation.
End of Sharing a PowerPoint Presentation tutorial, return to main Tutorial page.
