
![]()
![]()
![]()
![]()
![]()
![]()
![]()
![]()
![]()
![]()
![]()
![]()
![]()
![]()
![]()
![]()
![]()
Adding PowerPoint File(s) for Student Download (either scroll down through page or select from one of the following choices)
About Downloading PowerPoint Files
Method 1: Adding as a Single Page
Method 2: Adding as an Attachment (Discussions)
Method 3: Adding as a Link in Action Menu (Content Module)
Method 4: Adding as Link on Content Module page
Download the Text Based Version
About Powerpoint Downloading PowerPoint files
Often instructors will want to add a PowerPoint presentation file (something.ppt) for students to download (not necessarily view online which is the best option for all students - view tutorial sections for "Adding a PowerPoint Presentation" for either Windows or Macintosh). Keep in mind files added as described in this tutorial can only be viewed using the free Microsoft PowerPoint Viewer (do a google.com search for Microsoft PowerPoint Viewer) or via an installed version of Microsoft PowerPoint.
There are various methods to add a PowerPoint file for downloading.The most consistent method for any file type added to a course (including PowerPoint) is as an attachment using one of WebCT's tools (mail, discussions, assignment). Other methods include adding them as a single page link, as a text link in the Action Menu of a Content Module or as a direct link on a Content Module page.
This tutorial covers 4 methods for adding a PowerPoint file for downloading, beginning with the simplest method - as a single page link.
Method 1: Adding as a Single Page
One could choose to have all PowerPoints for downloading located in a single course section. To create a new course section for these downloads please review "Adding a new course section", then proceed with this tutorial.
If you have added a course section for Presentations downloads click to enter.
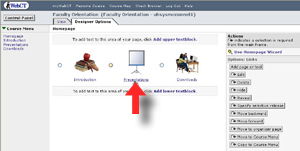
On the right select the button for "Add page or tool".
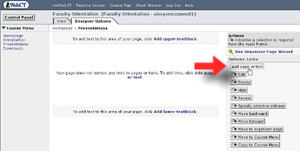
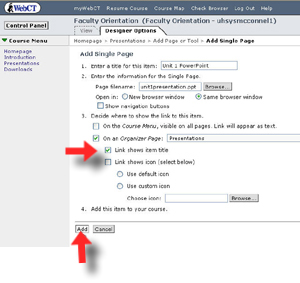
Select "Single Page".
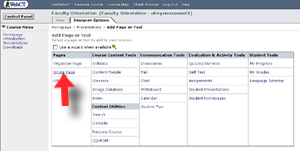
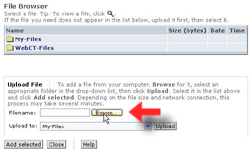
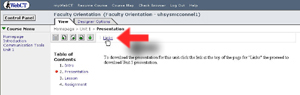
Enter a title for the presentation and click the "Browse" button.
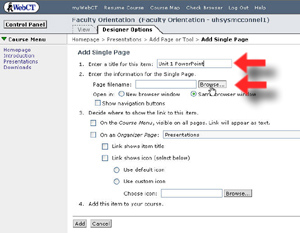
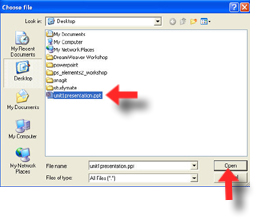
Select the "Browse" button to locate the PowerPoint file on your local computer.
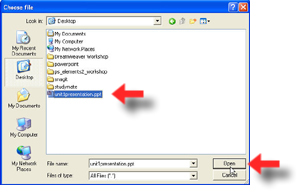
Once the file is located click once to select and click the "Open" button.
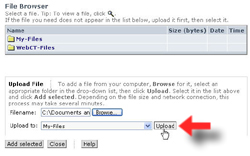
Select the "Upload" button.
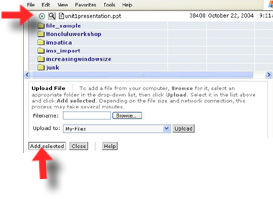
Confirm the uploaded file is selected and click the "Add selected" button.
Since the file is being added to a "Presentation" section select the option for "Link shows item time" and click "Add".
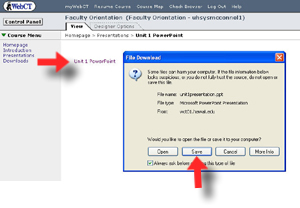
Students should be able to download the file by clicking directly on the file name and choosing "Save".
Method 2: Adding as an Attachment
The second method of allowing students to download a PowerPoint file is to add it as an attachment. These attachments could be in a Discussion topic area dedicated to downloading all PowerPoint files for the course.
To create a Discussion topic area for PowerPoint downloads, enter Discussions (in most cases this link is available in "Communication Tools").
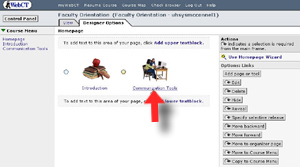
Click on "Discussions".
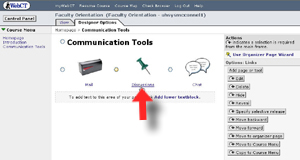
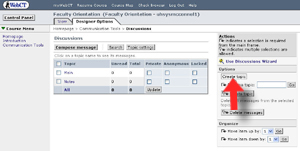
Over on the right select "Create topic" button.
Enter a title (for example: PowerPoint Presentations or Downloads) and click "Create".

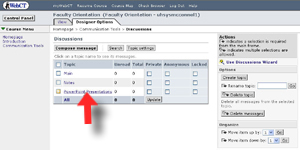
To enter the new topic, click on the newly added topic title.
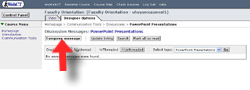
Click "Compose message" button.
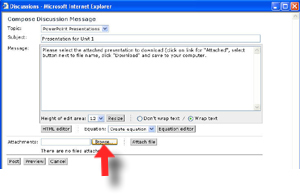
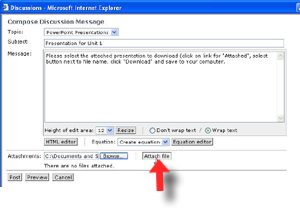
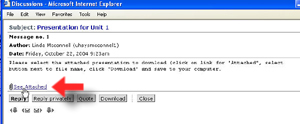
Enter a Subject (for example: Presentation for Unit 1), the message (perhaps directions for downloading the attached presentation file) and click "Browse".
Locate the PowerPoint presentation file, click once to select and click "Open".
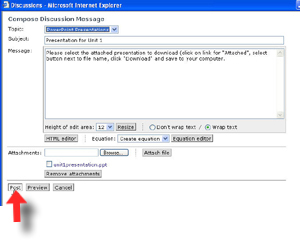
Click "Attach file".
Click "Post" to send to Discussions.
Students would then enter the topic area, open and select the message title to read by selecting directly on the message title.
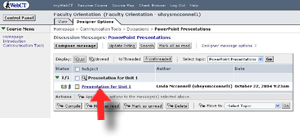
To download the attached presentation click on the link for "See Attached".
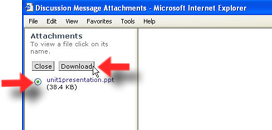
Select the radio button next to the attached file name and click the button for "Download".
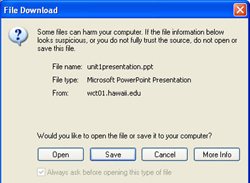
Choose to "Save" the file to the desktop or "my documents" .
Method 3: Adding as a Link in Action Menu
The third method of allowing students to download a PowerPoint file is to add it as a link to a content module Action Menu (located at the top of a content module page). A Content Module tool and all associated files must be added first. To add a content module to a course view "Adding a Content Module", then return to proceed with this tutorial.
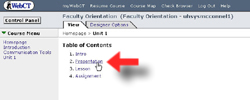
Enter the Content Module by clicking on the link/icon, in this case I am entering a module called "Unit 1".
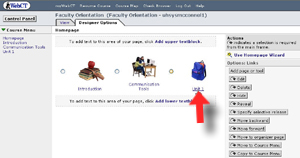
Select a content module page in which the link to download the presentation will be available, in this case I am selecting the page for "Presentations" (content module files must be added or created first) .

Make sure to be in the "Designer Options" view , under the header for "Action Menu" select "Links".
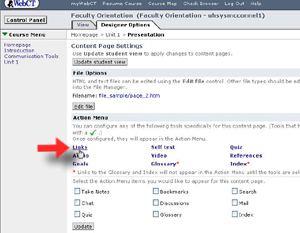
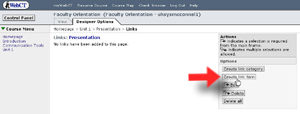
Over on the right select the button for "Create Link Item".
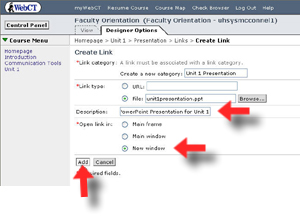
Enter a title (for example: Unit 1 Presentation), next to the header for "File:" click "Browse".
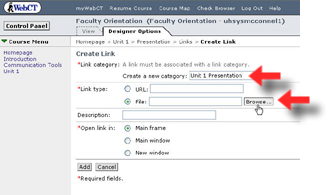
If the PowerPoint file has yet to be uploaded, click "Browse".

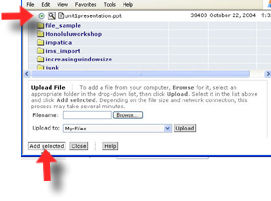
Locate the PowerPoint presentation file, click once to select and click "Open".

Click "Upload".

Confirm the uploaded file is selected and click "Add selected".
Enter a "Description" (for example: PowerPoint Presentation for Unit 1), select the radio button for "New Window" and click "Add".
To return back to the module click the on the title for the module located at the top of the page.
Select to "Update student view".
Click "Update".

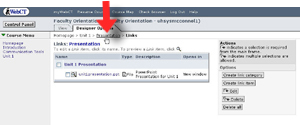
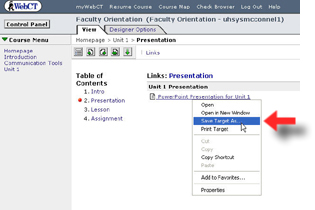
To download the PowerPoint presentation file students would enter the module and clicking on the file name for the page.
Select the text for "Link" at the top of the page in the Action Menu.
Proceed to either click on the link for the presentation title and save to the computer OR left-click and select "Save target as".
Method 4: Adding as Link on Content Module Page.
The fourth method of allowing students to download a PowerPoint file is to add a text link directly within the content module page by editing the file and using the HTML editor features for adding a link.
Enter a Content Module by clicking on the link/icon, in this case I am entering a module called "Unit 1".
Select a content module page in which the link to download the presentation will be available, in this case I am selecting the page for "Presentations" (content module files must be added or created first) .
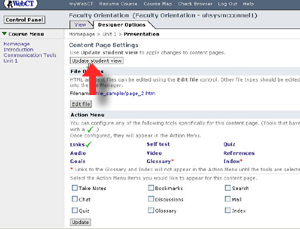
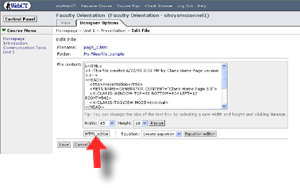
Make sure to be in "Designer Options" view and under the header for "File Options" select "Edit file".

Select the button for "HTML editor" and wait for it to load, you may be asked to agree to a certificate, please select "Grant always".
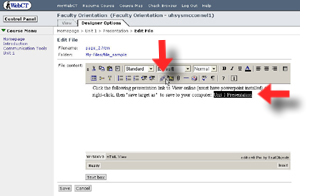
Using the editor add text similar to the following: Click the following presentation link to View online (must have powerpont installed) or right-click, then "save target as" to save to your computer: Unit 1 presentation
Highlight the text for "Unit 1 presentation" or highlight any of your own text you would want students to click on in order to download the presentation then click on the link chain icon in the editors menu.
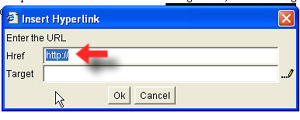
Delete the "http://" by highlighting the text and clicking delete. The textblock should be completely blank prior to proceeding onto the next step.
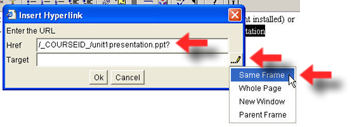
Enter the following text, without the quotes: "/_COURSEID_/nameofpresentationfile.ppt?"
In place of "nameofpresentationfile" type in the your presentation file name - it is case sensitive so you MUST type in the correct letter case. For example, in the following screen shot my presentation file name was "unit1presentation".
Click on the ..pencil icon and select "Same Frame".
Click OK when done.
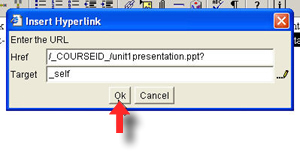
The text should now be a text link (underlined and in blue), click "Save".

Select "Update Student view" and click "Update"

To download the PowerPoint presentation students would click on the page title.

Follow download instructions, click to view or right-click and "save target as" to download.

Return to Main Tutorial Menu