
![]()
![]()
![]()
![]()
![]()
![]()
![]()
![]()
![]()
![]()
![]()
![]()
![]()
![]()
![]()
Narrating PowerPoint & Processing in Impatica (either scroll down through page or select from one of the following choices)
About Impatica
Narrating PowerPoint
Pausing Narration
Editing Slide
Saving Presentation
Alter Page Layout
Processing PowerPoint in Impatica
Uploading & Linking PowerPoint
Download the Text Based Version
About Impatica
Impatica converts a PowerPoint file (narrated or text) into a compressed format optimized for streaming over the Internet. Impatica works best for narrated presentations.
UH Faculty/staff can download Impatica by going to http://www.hawaii.edu/sitelicense/ (both Windows and Macintosh OSX versions are available) and scroll down to select"Impatica" . **Once entered into the download site please make sure to note the necessary license information, it is needed in order to fully install the application.
IMPORTANT: once downloaded and installed go to "Help" in the main menu, select "Check for Updates" and install. At the time of this manual writing Impatica has 2 versions 3.3.3 and 4 - either version function properly at this time.
Narrating PowerPoint
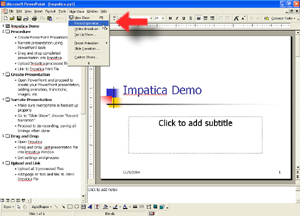
Create a PowerPoint presentation by inserting images plus text and save as a presentation file (File -> Save as: "something".ppt). Plug in a microphone to the computer hard drive headphone jack (view your computer manual if you need assistance in locating it). Once done you, use PowerPoint narration features to record voice by clicking on "Slide Show" and choosing "Record Narration".
Select "Set Microphone Level..".
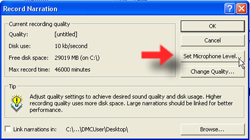
Talk into the microphone using a normal voice, the slider will adjust volume levels for you. Once the slider slows its movement click "OK".

It is now time to begin recording, click "OK" only when ready to talk...selecting "OK" will start the recording process from the first slide in the presentation.
TIP: wait a few seconds before talking once you get to a slide as well as pausing prior to moving forward to another, this will help make sure your voice is not cut off as you move from one slide to another.

Talk in the microphone as you would if giving a face to face lecture, when time to move onto the next slide, pause, then click on the slide with the mouse, this will forward the presentation to the next slide.

Pausing Narration:
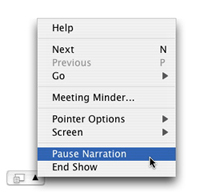
If you need to pause recording move the mouse over to the lower left corner, click on the triangle to pull up the menu and select "Pause narration", do the same process to start narration.
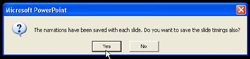
Once done with recording click "return" or "Esc" on the keyboard and select "Yes" to save timings.
Editing Slide:
If wanting to re-record over a narrated slide, scroll down to the slide in "Slide view" (in the main menu select "View" and choose ", then from the main PowerPoint menu click on "Slide Show", choose "Record Narration", go through setting up the microphone as described in the beginning of this tutorial and when prompted click on "Current slide".
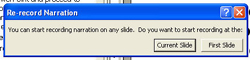
When done recording click the "Esc" button on the keyboard and select to save timings.
Altering Page Layout :
Page layout for each slide needs to be minimized which will reduce the need for users to scroll down to access the player controls.
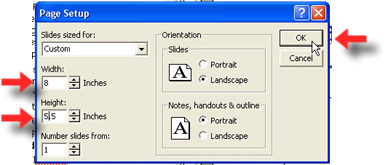
Using the main menu choose "File" and "Page Setup".

Decrease the Width and Height by 2, making it 8 by 5.5. This will minimize the size of the slide to make room for the Impatica movie controller which will be inserted at the bottom.
Saving Narrated Presentation:
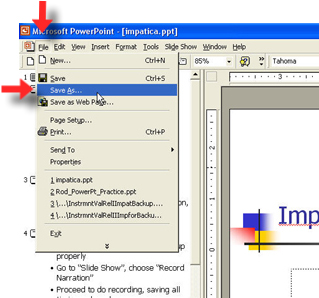
To keep the non-narrated portion of the PowerPoint presentation in its original format, from the main menu select "File" and choose "Save as", name the narrated version something different, with no spaces, underscores or dashes. The end result will be 2 powerpoint files, a non-narrated and a voice over version. It is the voice over version we will process through Impatica.
Processing PowerPoint in Impatica (this process is exactly the same for version 4, just the interface is slightly more updated and the names of the IMV files represent version 4):
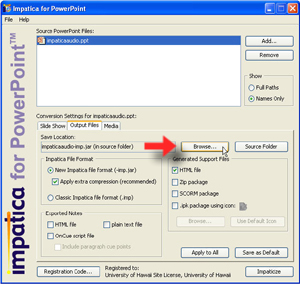
Open Impatica by double clicking on the icon (Impatica must be installed). Drag and drop the narrated or recorded PowerPoint file into the Impatica window, alternatively one could click the "Add" button and browse for the file.

Select the checkbox for "Include playback controls".
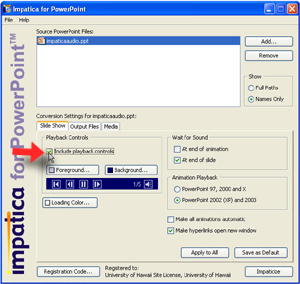
To choose a location in which to save the Impaticized version of the presentation click "Browse".
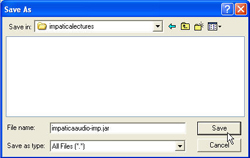
Locate an area on your computer, Desktop or My-documents and select the option to create a new folder.

Name the folder the same as the presentation, no dashes, underscore or spaces, and click "Save".
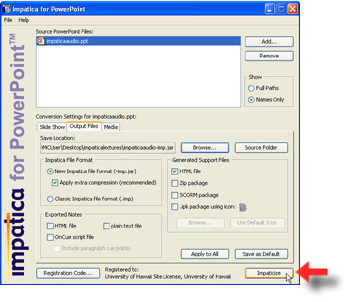
Select the button for "Impaticize".
Impatica will process each slide, wait till it indicates the slides are done.
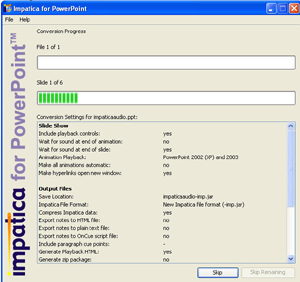
Impatica is now finished. Choose to quit the program.

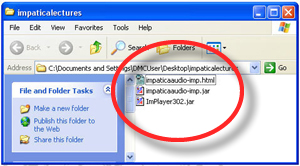
Inside the folder there should be 3 files, all 3 need to be uploaded to the course.
Uploading & Linking PowerPoint:
Create a WebDAV connection for uploading (view the online tutorial for either Windows or Macintosh). Once the connection has been created drag and drop the entire folder into the connection window.

Once uploaded, log into the Homepage of the course and select "Add page or tool".

Select "Single Page".

Enter the title of the presentation and click "Browse".

Scroll down to the uploaded folder, click once to open, select the top file (the one with the .html extension name), scroll down and select the button for "Add selected".

Select the desired location(s) for the link to appear (on the Course Menu and or Organizer page) and click "Add".

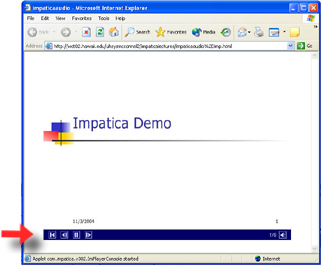
The narrated/impatica presentation has been added, students click on the link to view the show, using the controls to pause, move forward, stop, etc.
Return to Main Tutorial Menu